Last month, I sent a personalized card to one of my best friends, Sarah. She was my childhood best friend, and I wanted to try something unique that I could send via envelope. Hence, I designed an envelope myself using the Cricut machine. Today, I am going to show you how to make an envelope on Cricut with the help of this blog post.
The procedure of making a paper envelope is so easy. So anyone can create it if they have basic supplies, such as a Cricut mat, scoring wheel, Cricut machine (Maker or Explore), paper, fine point blade, and glue.
Despite this, there are multiple templates available on Cricut Design Space, and you can easily download them to get started within a minute. Now, let’s delve into this tutorial and explore the step-by-step instructions to make an envelope for your loved ones.
Step 1: Add a Template to Canvas
In order to learn how to make an envelope on Cricut, first, we need to add a template. There are multiple free templates available on the Cricut app. Follow the steps provided below to add the template to your Canvas:
- Launch the Design Space and go to the Canvas.
- On the Canvas screen, you have to select the Images icon given on the left panel.
- Afterward, you need to search the envelope on the given search bar.
- Then, choose the envelope that you like and then single-click on the chosen envelope.
- Next, hit the green button Add to Canvas.
Since you have added the template to the Canvas, you can start editing it. In the next section, we will learn how to edit the added envelope template.
Step 2: Edit Your Envelope Design
On the right side, there is the layer where you can find all the layers as part of the design. Let us see below how to edit the design and then learn how to make an envelope on Cricut.
- First of all, you have to Ungroup the layers.
- After that, choose a square shape from the Shape section on the left panel.
- Then, change the line type to Score to inform your machine whether you want to use the scoring wheel or scoring stylus. However, cut lines should remain the same as Cut in the Linetype.
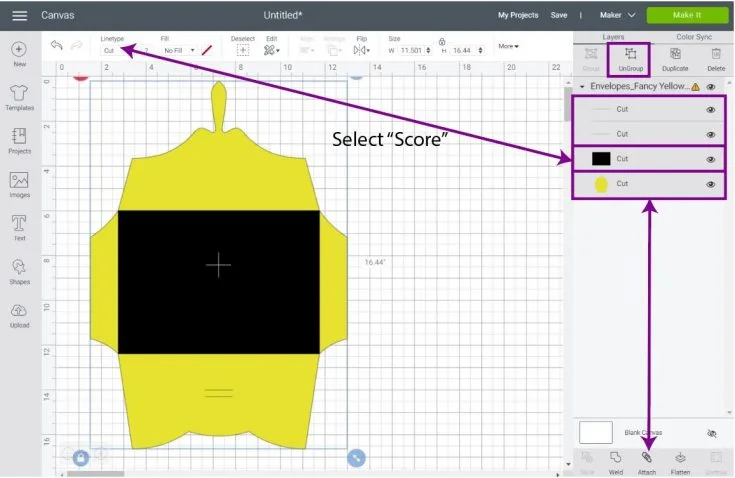
- Lastly, select all the layers together and hit Attach, given at the bottom.
Step 3: Resize the Envelope
You can resize an envelope simply by creating a card template. It is an imaginary shape that can be set as per your needs. To resize the envelope, follow the steps given below:
- Click on Shapes, which is located on the left of the Canvas.
- Then, select a Square shape.
- When the square appears on the Canvas, you have to select it.
- After this, change the size from the top panel.
- For this, you have to click on the small lock icon, unlock it, and then set the size accordingly.
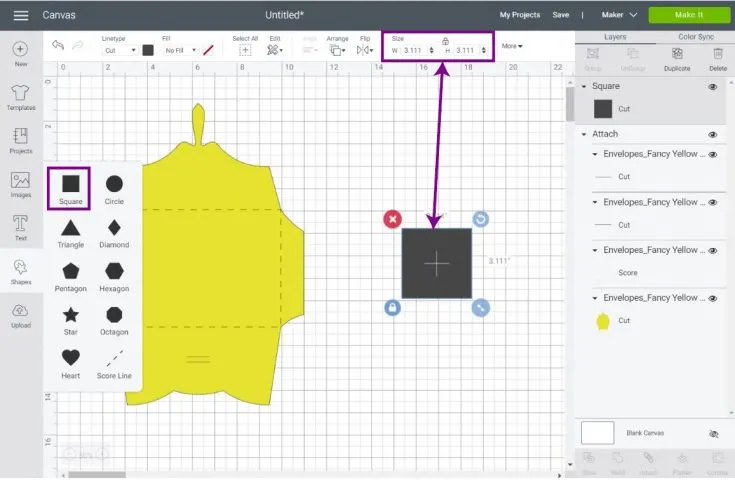
- The size of the card I needed was 5” x 3.5”.
- Make sure your project size doesn’t exceed the size limit of 11.5” x 11.5”.
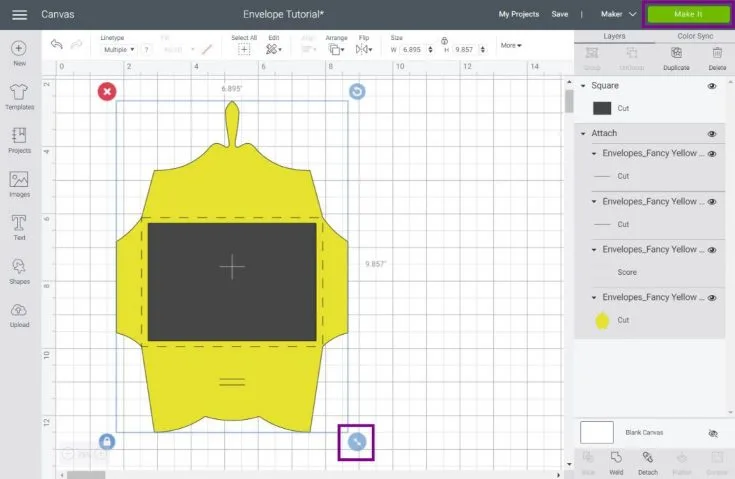
- Now, we have set the size for the square; you need to select the envelope attachment and resize it so that the score lines will wrap up the card design.
- Ensure there is a small margin so that the card fits easily inside the envelope.
- Once you have done the resizing of your envelope, you can delete the card template and then hit the Make It button.
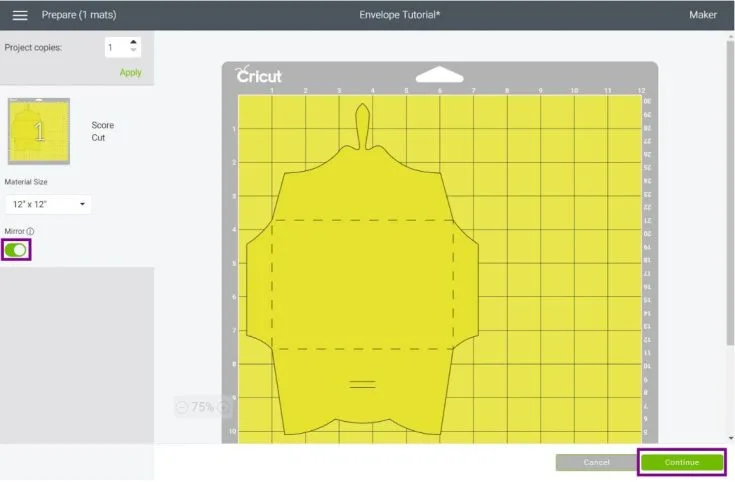
- Next, you should turn on the Mirror in case you place the materials coated down. Finally, select the Continue button located in the lower left corner.
By now, I have taught you how to make an envelope on Cricut. Next, I am going to show you how to select the right materials and tools for cutting the design.
Step 4: Select the Material and Tools
Here, you are supposed to select the compatible material and tools for your envelope. Although the choice is personal, I have chosen the Medium Cardstock option.
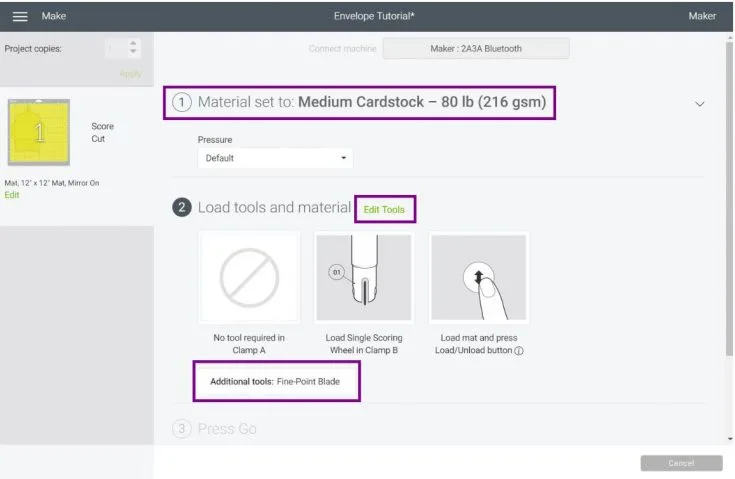
Note: Cricut Explore users must use the “Scoring Stylus” to fold the card. Besides, the advantage of using the “Stylus tool” is that you can install it along with the “Fine Point Blade.”
On the other hand, the Cricut Maker machine users have to select the “Scoring Wheel” to make score lines. If this tool is not available, then you can click on the Edit Tools option and choose “Scoring Stylus.”
Step 5: Cut the Design and Assemble Your Envelope
Whenever you are making envelopes, boxes, or any other similar projects, make sure you keep the coated or pretty size always down. As you are moving ahead to cut the design, you need to place the paper on the mat carefully.
Since my paper had color on both sides, I didn’t need to think about the placement of the paper on the mat. Finally, you have to load the scoring tool and Fine Point blade along with the Cricut mat.
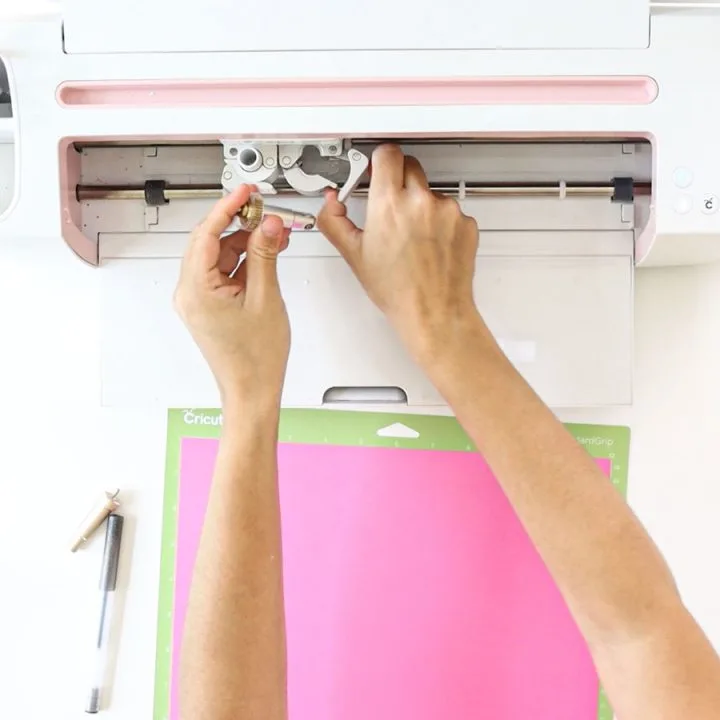
Then, press the flashing Go button on the Cricut machine to begin cutting.

Note: For Scoring wheel users, first the Scoring Wheel will be installed, and then the Blade.
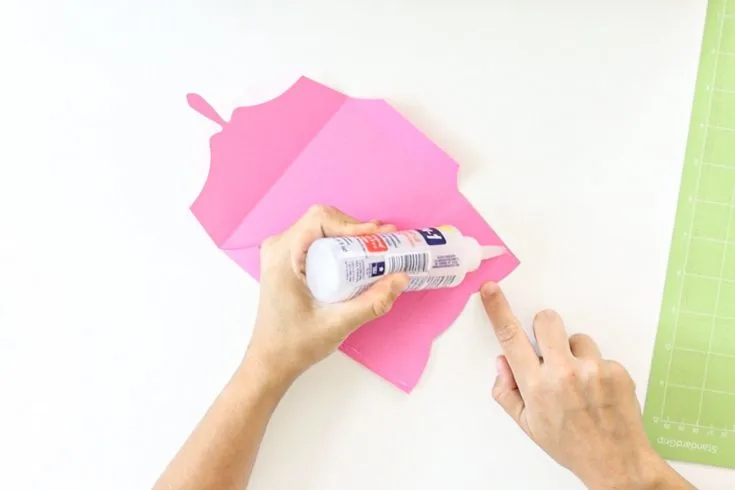
After cutting, simply unload the mat and remove your cut envelope. Last but not least, you need to assemble it. It is so simple and easy. All you need to do is fold towards the scoring lines and use the glue to connect the envelope.
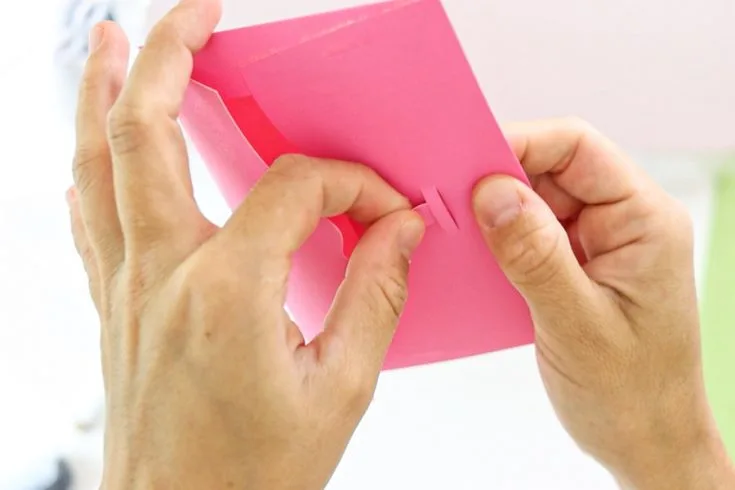
Here’s our simple tutorial on how to make an envelope on Cricut ends!
FAQs
Question 1: Can I use Cricut pens on my envelope?
Answer: The right pen is essential to provide professional results. No matter what you are trying to create, using the right tool will make a significant impact on your projects. So, if you want to write something that looks like calligraphy, then you can use these Cricut pens to write the address or anything on the envelope.
Question 2: How do I print the address on an envelope using Cricut?
Answer: Using Cricut to address envelopes is simple; all you need to do is follow the simple instructions. The methods below show how to address envelopes with Cricut:
- Add a rectangle which means exactly the same as your envelope.
- Next, choose the font you love and then type the address.
- Place the From and To addresses in their correct place.
- Now, you need to delete the rectangle and attach the address together.
- Finally, hit the Make It button to preview the text on the mat.
Question 3: Which Cricut mat should I use for creating custom envelopes?
Answer: When you have finished your design on Cricut Design Space, then you need to select the material. Afterward, you will have to use the LightGrip mat while cutting. The LightGrip mat, as the name itself suggests, comes with a light grip adhesive that is suitable for light materials such as paper.